Itch to Stitch Crystal Cove Cami Review
- sewmuchmorefun

- Jan 11, 2021
- 5 min read

When I designed my autumn collection (which is a fancy way of saying 'the list of things I planned to sew by the end of 2020',) I originally included a cream top using the Seamwork Emmie pattern.
However, after I made the toile I decided that the style didn't really suit me and so I decided instead to make the Itch to Stitch Crystal Cove Cami. The fabric I wanted to use from my stash was a cream satin that is quite shiny and I thought that this style would really show off and work well with the fabric.

At the time of writing it is winter in the UK and so a cami top might not be the obvious choice to make but I wanted to have something that I could layer up with long cardigans and then when the warmer weather eventually makes and appearance I can wear it then too.
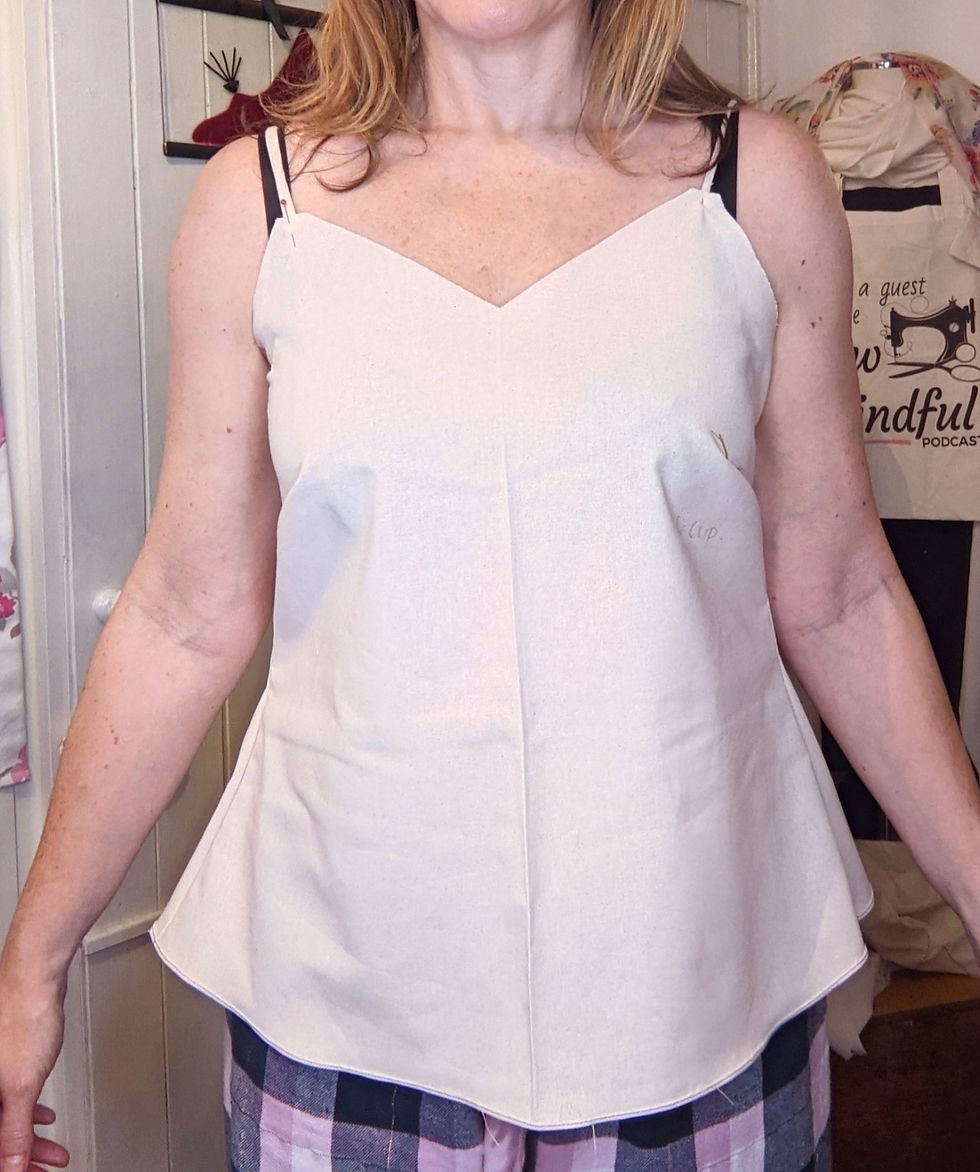
The cami has rouleau spaghetti-style straps and a shallow V at the front. It also has a lovely overlapping cross over at the back with rounded hems. It has some shaping in the front with a couple of bust darts and slightly fitted shaping at the waist on the side seams.
It is designed for woven fabrics and the pattern comes with different bust cup options already built in.
Size Range
Sizing goes from 00 to 20. This covers
bust sizes from 30 1/8 inches (76.5cm) to 49 1/4 inches (125cm),
waist sizes from 25 3/8 inches (64.5cm) to 40 1/2 inches (103cm) and
hip sizes from 33 1/8 inches (84cm) to 43 1/4 inches (122.5cm).
There are also instructions on how to choose your size for the various different cup sizes on the website in the size chart section.
Size I Made
Initially I blended the sizes to go from size 4 at the bust to 6 at the waist and 8 at the hip.
After making the toile I made some adjustments and for the final version I made 4 at the bust and 6 at the waist and hips.
I haven't tried the different cup options before for this brand so I cut toiles for the C cup and the D cup.
I ended up making the C cup as it fitted nicely around the bust and across the back but it did still need some adjustments (see below for details).
My Measurements and Body Type
Height: 5'2"
Bust: 36"
Waist: 30"
Hip: 40"
Bra: 32DD
Body type: I am an H shape from the front but I stick out a bit at the front at the boobs and at the back at the bum. I also have a bit of a rounded upper back (from too much time on a computer!)
Adjustments I Made
As with many patterns I needed to make some adjustments on the back as it did bunch up a little. On the toile I sewed a tacking line down the centre back to hold the two overlapping pieces where they should sit so that I didn't get thrown off by that.
It seemed like I needed to pull the back up to get it to sit right so I ended up doing a small sway back adjustment taking a bit more out at the centre back than the side seam. I shortened the centre back by 1 1/4 inches and the side seam by 3/4 inch.

To compensate for the change to the length of the side seam I also increased the bust dart by 3/4 inch which helped to stop the front from sticking out at the bottom.

I also wasn't sure about the shallow V neckline so I decided to make that a little more rounded and I really love the new shape that I used for the final version. This meant a small adjustment to the front bodice piece and the corresponding facing piece.

The final adjustment I made was that I wanted it to cover my bottom a little bit more so I straightened the back pieces and made a smaller curve so that it crossed a bit further down.

Fabric I Used
I had some cream satin in my fabric stash and I am not sure where it came from as I have had it for some time and it was ideal for this project.

I also planned to make a second version in a dark blue silk from Sew Wardrobe that had also been in my stash for a while.

The pattern recommends lightweight woven fabric without stretch or with minimal stretch. I would say something that is a bit drapey will work best so it doesn't stick out or catch at the back.
Construction Process and Instructions
The instructions are detailed with some good images. The pattern only has 1/2 inch (1.25cm) seam allowance and as I am used to the more traditional 5/8 inch (1.5cm) I had to remember that when sewing.
You will need interfacing for the facing pieces. There are quite a few curved edges so I did do the stay stitching around the neckline and armhole edges to stop it stretching.
The most challenging element is the small double turned hem that goes all down the back pieces, around the curved edge and along the bottom. When making the toile I used my rolled hem foot on my sewing machine and it turned the hem well but I ended up stretching the edge and it went wavy.
On the cream version I used the rolled hem foot and it didn't stretch this time but there are some bits where it didn't complete the full double turn but rather than mess with it, you don't see it from the right side and so I have left it.

On the navy version it took me several attempts because the silk wouldn't easily work with the rolled hem foot and so I ended up double turning it by hand which took ages - definitely something I am going to practice more for the future.

Other than that the rest of the construction is really easy. Making the spaghetti straps is easiest if you have a slippery fabric. I use a hair grip to turn the strap but you can get tools specially for that it you prefer.

My Thoughts About the Pattern
I really like this pattern. With the fitting adjustments it is really comfortable and layers really well under my long cardigans and jackets.
The length is good and because the fabrics feel quite luxurious it both versions feel really dressy to wear and I think they would dress up a pair of jeans or add to a smart pair of trousers or skirt.

Will I Make it Again?
Well bit of a spoiler alert but yes I already made two! I do love it and aside from the rolled hem it is really quick and easy to make.
I would recommend the pattern although you might need to experiment with the cup sizing to get the best fit.
Final Assessment
Sizing - 4/5. It offers a reasonable range of sizes and is true to the measurements. The size range isn't as big as some of their other patterns.
Instructions - 5/5. Detailed instructions of how to assemble the pattern, make adjustments and assemble.
Construction Process - 4/5. Easy to put together. Pattern pieces fit together well and markings are good. Hem is a bit tricky
Final Fit - 4/5. Really good fit and I like the shaping
Overall Rating - 4.5/5!! Love it!
Over to you!
So let me know in the comments what you think. Has it inspired you to make some of your own? Have you made these already? Do share as I am super inquisitive and love to know what you are up to!
*Disclosure: I only recommend products I would use myself and all opinions expressed here are my own. This post may contain affiliate links that at no additional cost to you, I may earn a small commission. Read full disclaimer here.


Comments